From signup to your first issue built into a pull request, from the Work page, in about ten minutes.
By the end of this page, one of your issues is a work item on your factory’s Work page. A host builds it into a pull request, and the item’s page shows the pull request and its checks.A new factory’s Work page opens on a three-step setup panel. Steps 1 to 3 below match it. Step 4 happens on the item’s page.
Claude Code, installed and on your PATH. Only Claude Code has a session-start hook, so only its sessions are recorded as work.
Node.js 22 or later.
A GitHub repository with at least one open issue, where you may install a GitHub App. Connect a repository says who can install it. The examples use issue 42.
A host, or time to build it yourself. A host is a machine running outerlayer runner for your factory. Without one, the item waits, and you build it in a session of your own. To set one up, see Run work on your machines.
The CLI runs as npx @outerlayer/cli. Other pages write outerlayer for short. If you installed it with npm install -g @outerlayer/cli, type outerlayer.
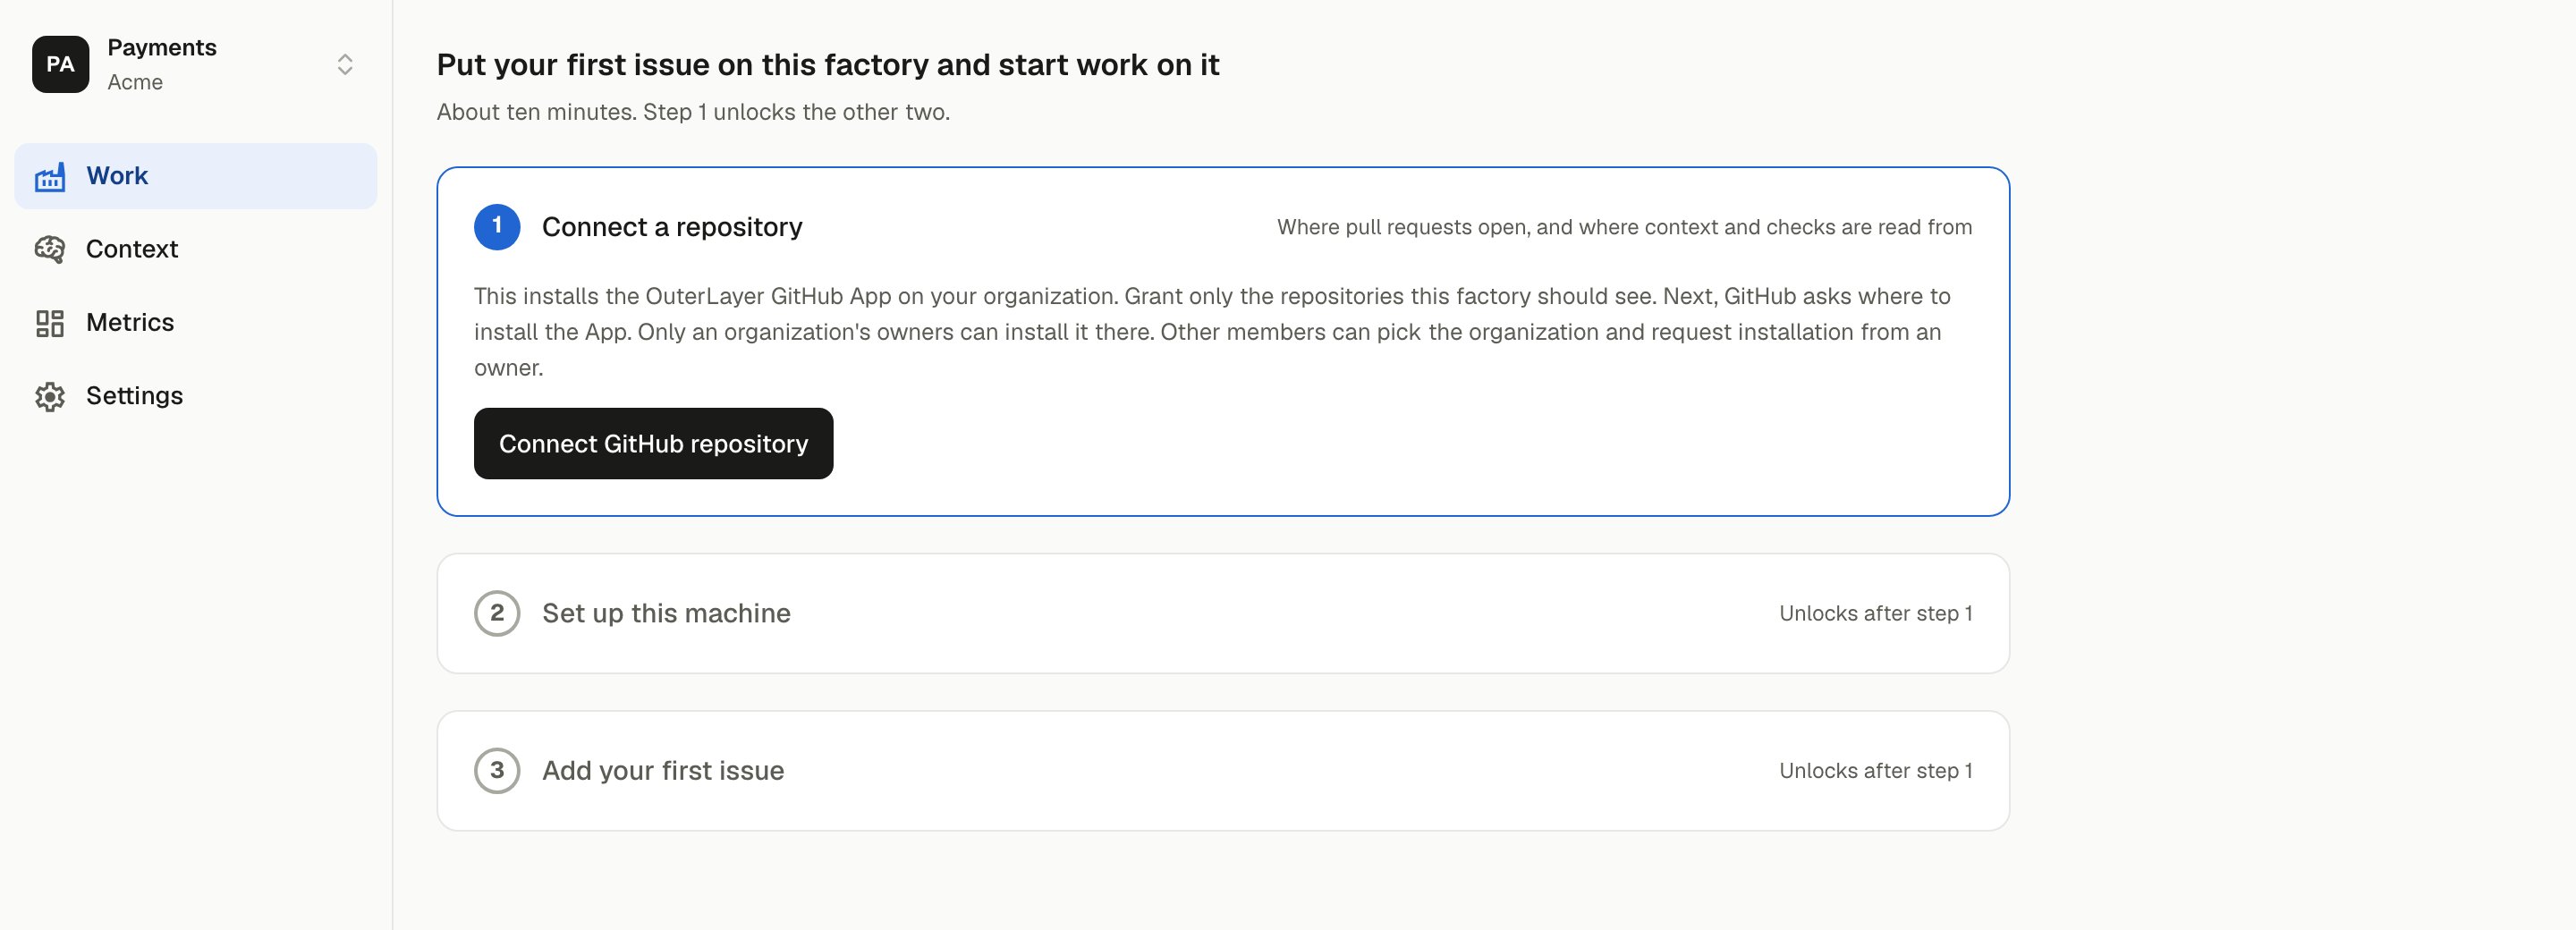
Sign up at app.outerlayer.ai. Create an organization, then a factory. Key concepts says what a factory is.If someone at OuterLayer invited you, skip that. Your organization and a factory named Default already exist, and the invite link opens the Default factory’s Work page. Rename the organization under Organization settings → General, from the account menu at the bottom left. Rename the factory from the Factory settings menu, the gear on its card in the Factories list, by choosing Rename.The factory’s Work page opens on the setup panel. Step 1 unlocks steps 2 and 3. Each step is done without leaving the page.
1
Connect a repository
Choose Connect GitHub repository on the panel. GitHub asks whether to grant all repositories or only selected ones. Select the one holding your issue.
The panel on a new factory, with the first step active.
GitHub returns you to the panel. Choose Link repository, then pick the repository and its base branch. Checks and policy are read from that branch. The step marks itself done.The App reads issues, pull requests and CI results. It posts nothing on your pull requests unless you turn that on in the factory’s settings. That setting is off by default.
2
Set up this machine
Run two commands yourself, or paste a prompt into your coding agent. Neither asks for a key. This step never marks itself done.Run the commands. Run this block inside your repository’s checkout:
login signs you in once per machine. You approve a link in your browser. Replace <org>/<factory> with your organization’s and factory’s names, as they appear in the dashboard’s address. The setup panel fills them in for you.init does four things, and asks nothing:
connects the repository to your factory
installs the capture hooks
adds the starter skills and the OuterLayer MCP server for Claude Code
runs doctor, whose checks may warn on a fresh machine (which ones)
It changes nothing you wrote by hand, and it leaves the new files uncommitted.Or set up with your agent. Open Claude Code in your checkout and paste this prompt. The agent hands you each link to approve. It never prints a token.
Set up OuterLayer in this repository.OuterLayer is an open-source software factory: an issue goes in, and a reviewedand verified pull request comes out, built by the coding agents this team alreadyruns, in this repository. Setup signs this machine in to my OuterLayer account,connects this repository to my team's factory, and installs the hooks and skillsthat let you build issues for it.1. Run `npx @outerlayer/cli login`. It prints a link and a code. When it does, give it to me and wait; I approve it in my browser. Then run its check as `npx @outerlayer/cli login --check <id>`, with the id it printed, until it stops exiting 75.2. Then run `npx @outerlayer/cli init --factory <org>/<factory>`. It connects the repository, installs the hooks and skills, and runs a health check. If it prints a link to link the repository, give it to me, wait for me to say done, then run `npx @outerlayer/cli connect --factory <org>/<factory>`.3. When `init` ends, tell me what it says to do next, including any line about committing and pushing `.outerlayer/`, and what `doctor` reported. Then stop. I add work from the Work page, not from here.Never print anything these commands call a token or a key.
You run connect yourself only when init prints a link to link the repository. With --factory, connect uses the factory you name. Without it, connect picks a factory by itself when only one fits, and otherwise asks on a terminal. Without a terminal, as under an agent, it exits 1 and lists each --factory value to pass. If the repository is not linked to the factory yet, connect prints the link to the factory’s Work page and exits 2. Link it there in step 1, then run connect again.Then commit and merge the new files.init writes your policy and skills to .outerlayer/, and adds Claude Code files beside them (which files). Commit them all and merge them to the branch your pull requests target. Policy is read from each pull request’s base branch, so until then no check runs. init and connect both print a reminder to commit and push .outerlayer/ while it holds uncommitted files.On a machine with no browser, choose No browser on that machine? at the bottom of the step. It makes a key and fills it into the commands.Every option and check: Capture commands and Cloud commands. init --local installs the hooks only.
3
Add your first issue
The panel’s third step is Add your first issue. It opens a dialog listing the open issues of the connected repository. A connected tracker is a second source in the same dialog. Choose Build beside your issue. A host builds it.
Step 2's agent prompt, and step 3 with its Add your first issue button.
The issue is now a work item, and the factory gives it a number of its own. Issue 42 might become item 7. From here on, 7 names the item on the Work page. The issue number never does.The item’s page opens with that number in its heading.
4
Build your first issue
Stay on the item’s page. Its Sessions list shows the host’s session as it runs. When the build finishes, the page shows the pull request the host opened.This step ends when the item’s page shows the pull request and its evidence rows on its Checks tab. Open the session to read every turn, the tools it called and what it cost.No host running? The item waits. On the item’s Activity tab, expand Run it yourself to build it in a session of your own. Launch a session covers that session.
A session on your machine uploads in full when it belongs to a work item. API keys and tokens are redacted on your machine before anything leaves. What leaves your machine lists everything that uploads.To see what would go before it goes, run npx @outerlayer/cli sync --dry-run. It prints one row per session and makes no network calls.
Every issue you add gets a number. Choose Build beside it in the add dialog, and a host builds it. The session, the pull request and its checks land on the item’s page. You approve the item, or send it back, from there.
The item’s page says whether a host has taken it. An item no host has taken stays queued. Check that a runner is running for your factory: see Run work on your machines. Or build it yourself with Run it yourself on the item’s Activity tab.To take an item off the Work page: npx @outerlayer/cli work remove --item 7 --reason "opened by mistake".