

Add work
Add an issue to the Work page to make it a work item and start its build. To start work that has no issue yet, see Draft a spec on a work item. You need the Add work permission. The button is off until the factory has a connected repository. A build needs a runner. See Set up a host or Run the runner in a container.- Choose Add work.
- If the factory has more than one source, pick one in Source. A source is a repository, a Linear team or a Jira project.
- In Find an issue, type the issue’s key, its URL, or words from its title or a label.
- To list only the issues with a label, choose Label and pick one.
- Choose Build beside the issue.
- If Run this build on shows, pick Managed runners or Self-hosted runners.
- Write Instructions for the agent if you want. See Give a build instructions.
- Choose Build.
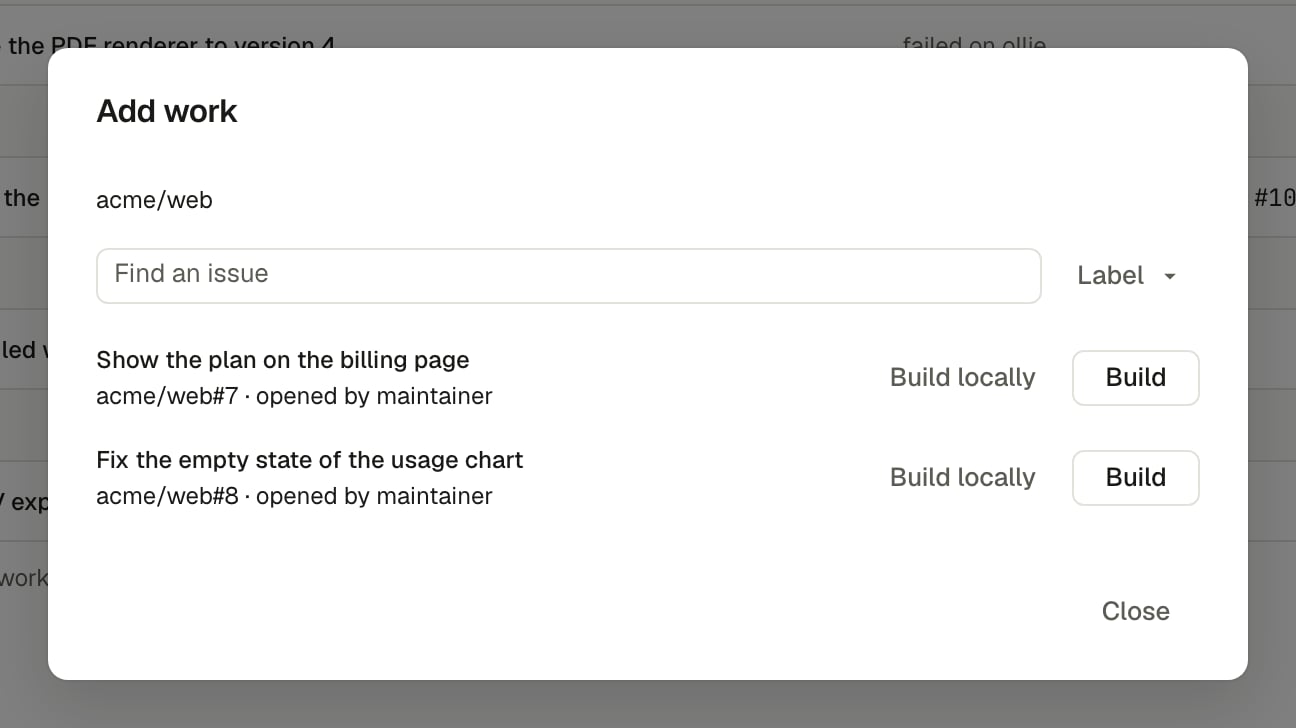
The Add work dialog lists the open issues of a source.
Give a build instructions
Instructions are text for the agent that runs one build, up to 2,000 characters. The agent reads them as guidance from you. They never change which issue is built or which checks run. The issue’s criteria win if the two disagree. You can give instructions in four places:- Add work. Write them in Instructions for the agent, in the second step.
- The first build of an item that is not started. Write them in the note field beside Build on the item page. See Build an item that is not started.
- A rerun. Write them in the rerun dialog on the item page. See Rerun a Stuck item.
- The CLI. Pass
--instructions <text>toouterlayer work build.
Start a build with a label
Add the labelouterlayer-build to an issue in GitHub, Linear or Jira. OuterLayer adds the issue to the Work page if needed and starts a build for you. You do not open the dashboard or a terminal.
The build belongs to the person who added the label. OuterLayer matches that tracker user to a member:
- GitHub: your GitHub account must be the one you signed in to OuterLayer with.
- Linear and Jira: the email on your tracker account must equal your OuterLayer sign-in email. In Jira, your profile must show your email.
Change the label or turn it off
You need the Edit factory settings permission.- Open Settings, then Automations.
- Under Issues, choose Start a build from a label.
- To stop labels starting builds, turn the switch off.
- To change the label, choose Edit, enter the label and choose Save.
Build an item that is not started
Some items are on the Work page with no build. An automation adds one when its issue must wait for a member. Build locally adds one for a session of your own. Such an item reads Not started. Read the issue before you build it. You need the Add work permission to start the build.- Open the item from the Work list.
- To give the agent instructions, write them in the note field at the foot of the page.
- Choose Build at the foot of the page.
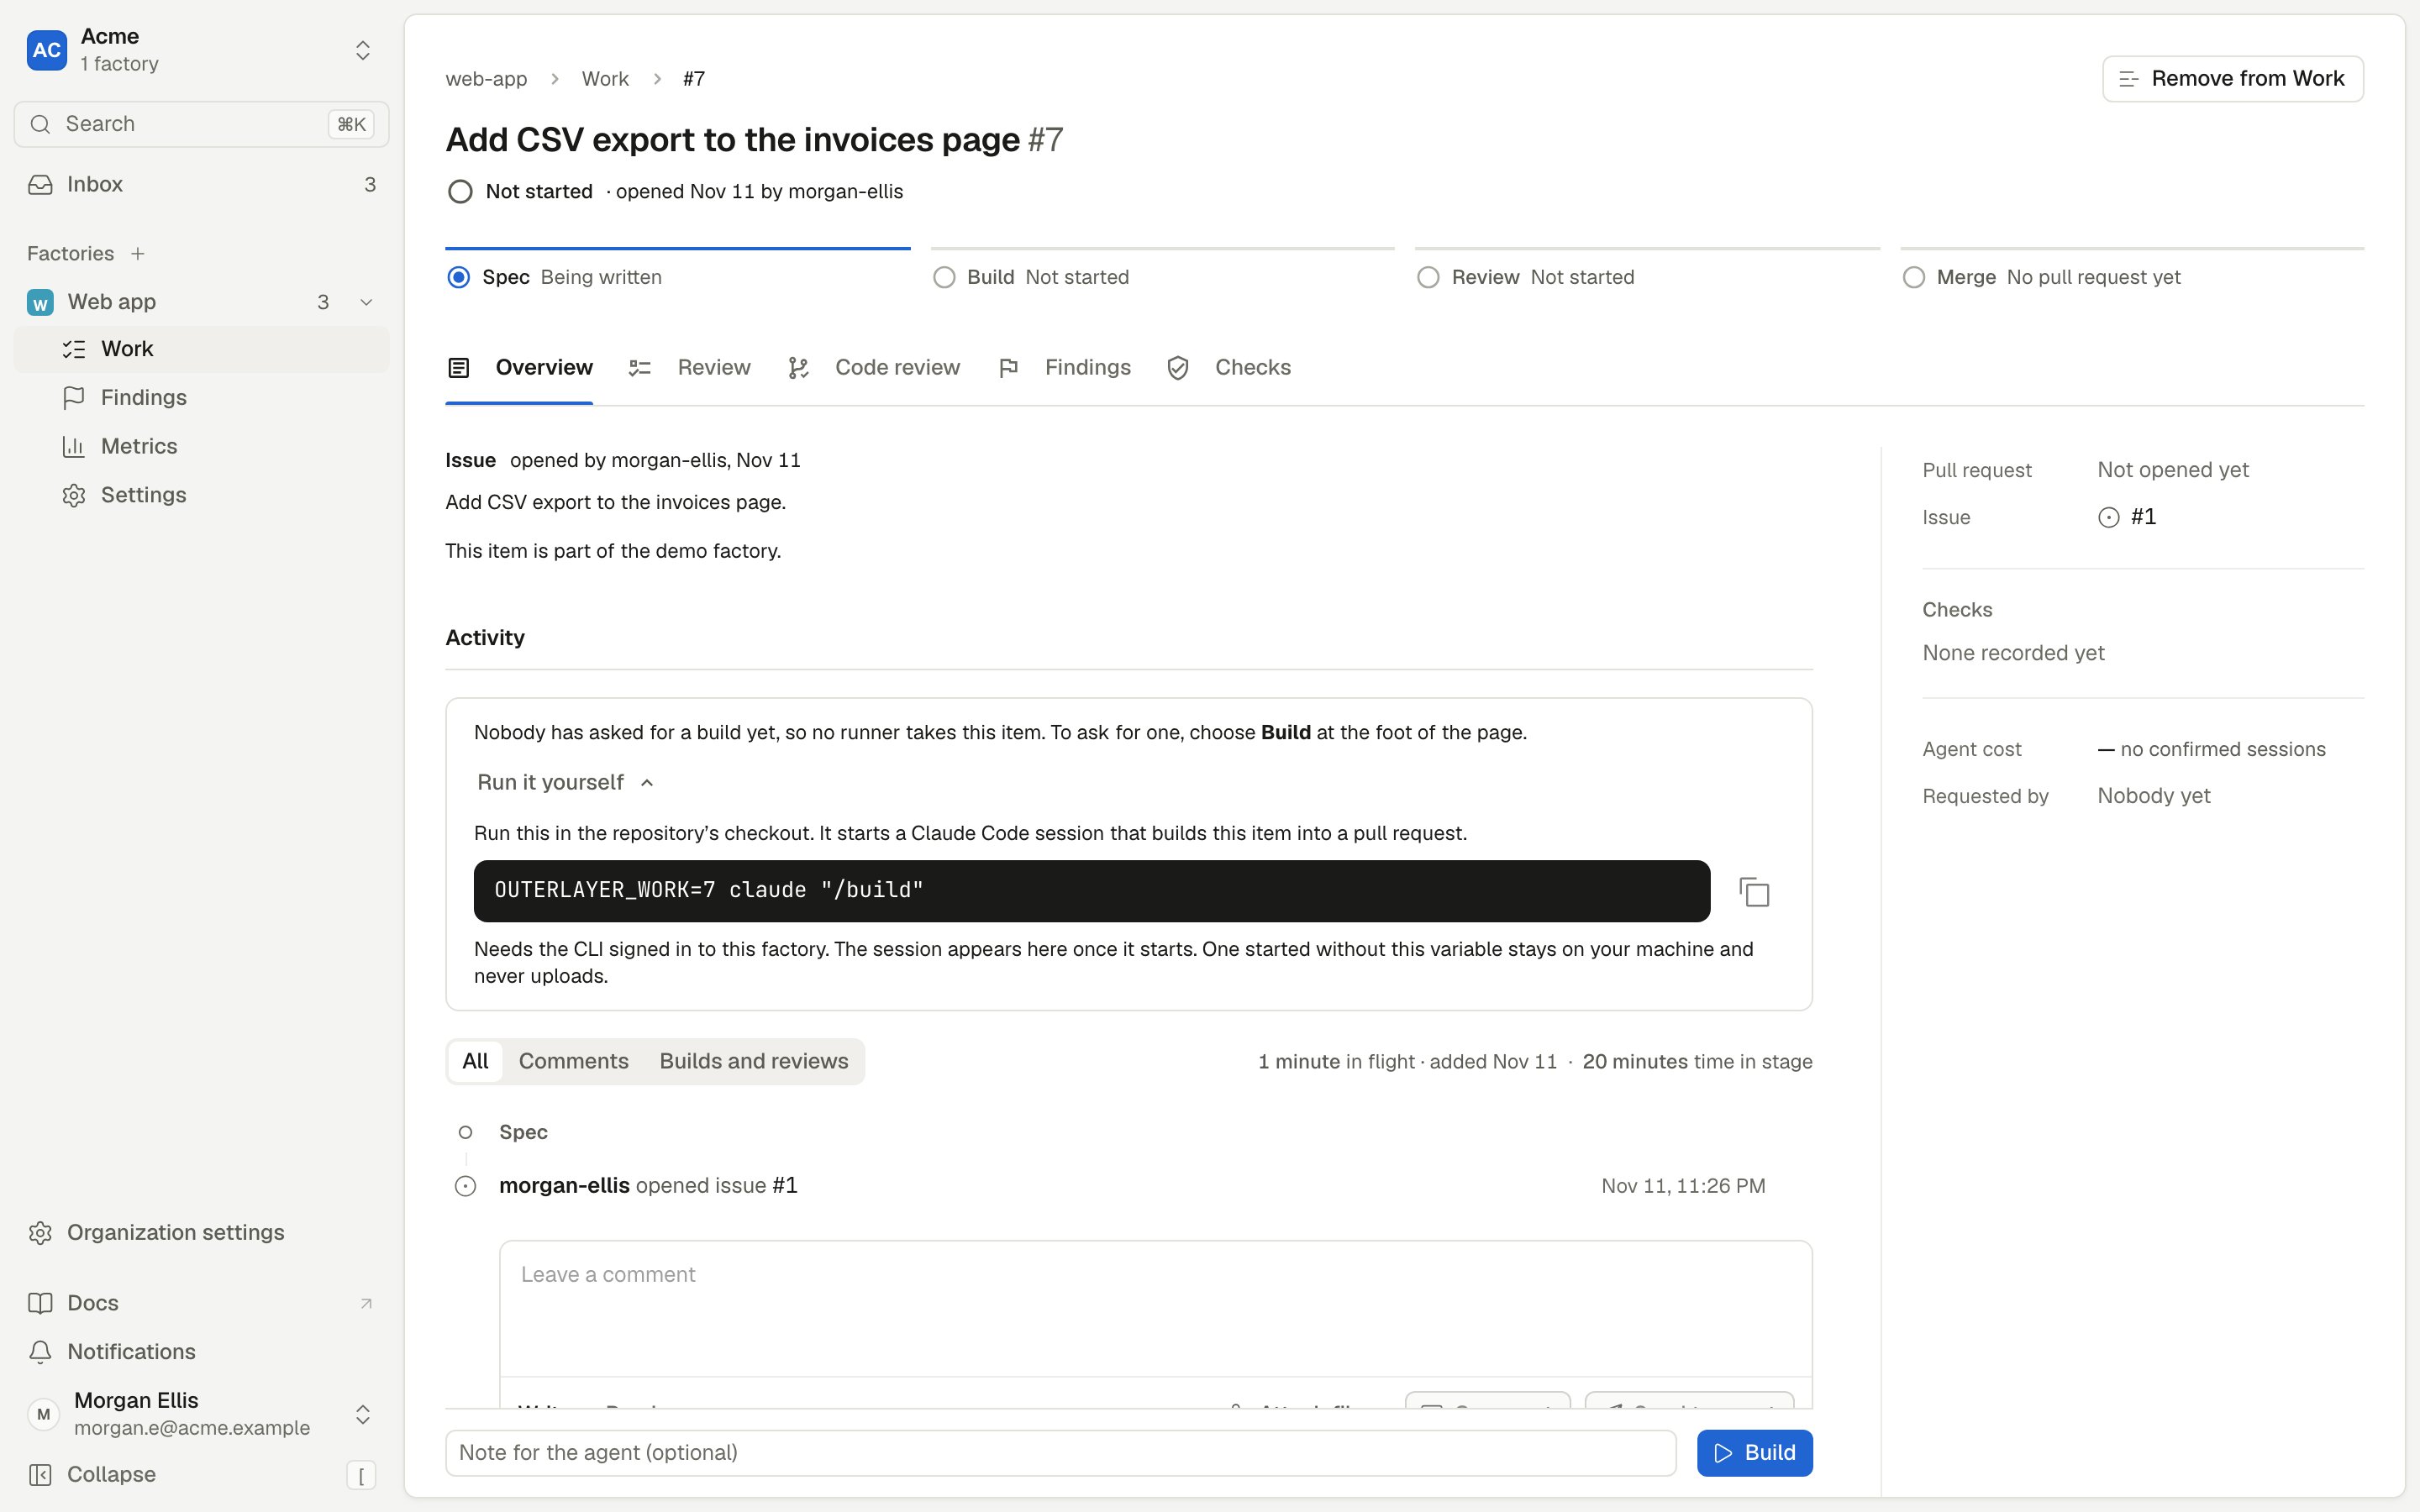
A Not started item, with Build at the foot of the page.
- Run
outerlayer work build --item <number>. The number is the one before the item’s title on the Work page. Seeouterlayer work build. - Add the build label to the issue. See Start a build with a label.
The Work list
The list has two tabs. Open groups its items by status, with the items that wait on a person first. Closed holds every item that shipped or whose issue closed, the most recently closed first. Each tab shows 25 items on a page.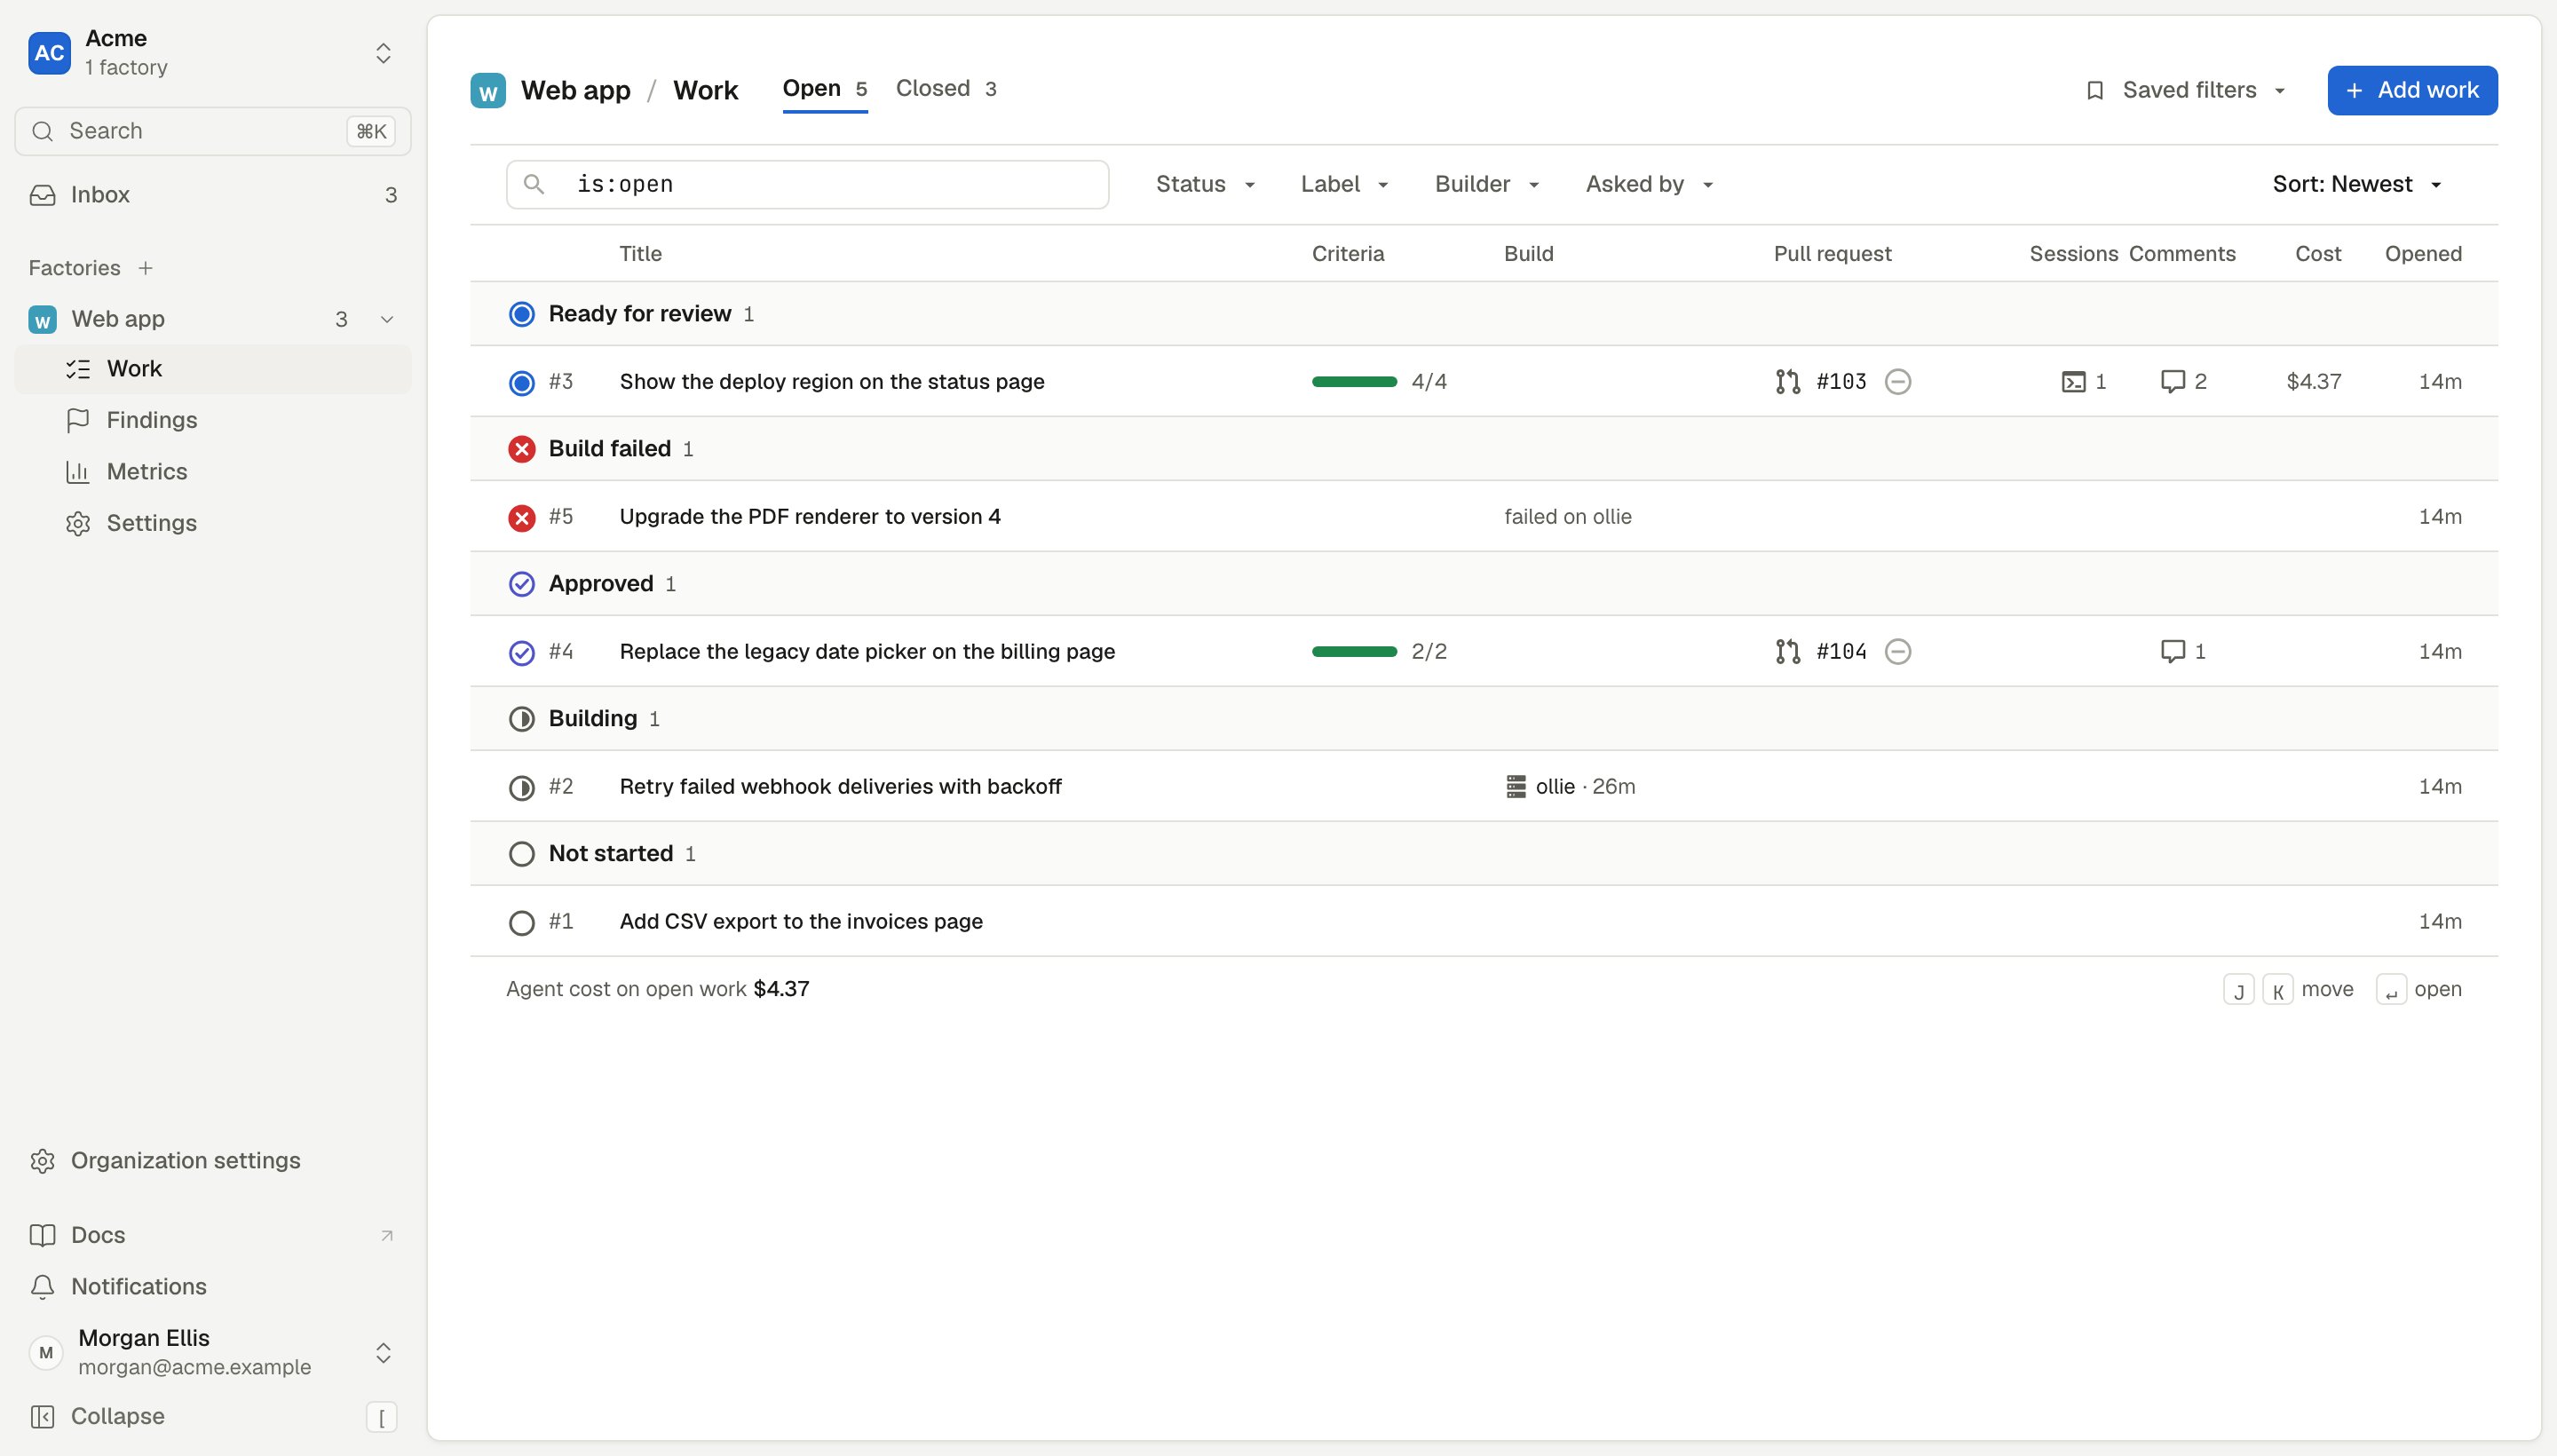
The Open tab groups items by status.
Filter the list
The box above the list holds the whole filter as text, such asis:open status:stuck sort:cost. Type in it, or use the Status, Repository, Label, Builder, Asked by and Sort menus beside it. Each menu writes its choice into the box.
The filter is in the page address. Bookmark a filtered view, or send its address to someone.
- A comma means OR within one qualifier:
status:stuck,back. - Different qualifiers combine with AND. Two
label:qualifiers also mean AND:label:bug label:uimatches only an item with both. - Any other word matches the item’s title, its number, its issue key or one of its labels. Every word must match.
builder:andby:match only an item that someone builds now, so they match nothing on Closed.- On Closed,
status:matches onlyshipped.
Saved filters
The Saved filters menu, beside Add work, replaces the text in the box with one of five filters:
Waiting on me leaves out an item with a failing check. To see every item that waits on a person, choose Needs you in the Status menu.
To remove a filter, choose Clear current filters under the box.
What a row shows
A row whose pull request changes a file under
.outerlayer/ says that it changes the repository’s rules. See Require a person’s review of rules changes.
Press J and K to move between rows, and Enter to open the selected row.
Statuses
Each item has one status, on its row and on its page. The status says whose turn it is.
An item moves to Closed when its issue closes in the tracker. Each tracker has its own rule for a closed issue. See Connect an issue tracker.
Find an item by its status
To filter by a status you read, use the Status menu or one of these words:
The saved filters use a second set of words. These words also look at the item’s checks and reviews. Each item matches one word, the first of these that applies:
shipped: on Closed, every linked pull request merged.stuck: the last build or amend failed or timed out, and nobody has asked again.building: no pull request is open, a check has not passed, or a declared proof is missing.with-agent: an agent holds the item, or a review waits for an agent’s answer.merging: a person approved the latest push.back: a person reviewed the item, and it is your turn again.ready: nobody has reviewed the item yet.
status:building, not status:ready.
Remove an item from Work
Remove an item when nobody will build it, such as a duplicate issue or a dropped idea. Removing deletes nothing and does not close the issue. The item leaves the Open tab, and its history, sessions and cost stay. To bring the item back, add the issue again with Add work.- Open the item.
- Select Remove from Work at the top right.
- Read what the dialog says the removal stops.
- To leave an open pull request open on GitHub, clear its Close … on GitHub box.
- Enter a reason.
- Select the button. It reads Remove from Work, Stop build and remove or Close pull request and remove.
outerlayer work remove.